Create 3d Printed QR Code
How to create QR code stl files for 3d printing, using Python, qrcodegen and OpenSCAD.
Introduction
Creating a QR code is reasonably simple, there are many online and offline tools available. But what if you wanted to create something more tangible, like a 3d printed QR code? Not so easy.
This workflow automates the creation of a svg file and stl files, which can then be sliced and printed out.
Approach and Dependencies
The target printer is a Prusa i3 mk3 with MMU2, which has the ability to print multiple filaments, but could be adapted to other printers.
The following are the dependencies:
- MacOS, 12.6 (Monterey)
- Python3, 3.10.6
- qrcodegen, 1.8.0
- OpenSCAD, 2021.01
- PrusaSlicer, 2.5.0
This workflow should be able to run on any OS, however the steps and commands provided are for MacOS only.
Install Python 3, pip and qrcodegen
This workflow uses Python 3, however installing Python 3 is out of scope of this document. The quick instructions are to either download the installer from:
https://www.python.org/
Or use brew to install Python 3:
brew install python3Confirm Python 3 is installed correctly:
python3 -V
Python 3.10.6
Pip3 should be installed as part of the Python 3 install.
Install qrcodegen via pip3:
pip3 install qrcodegenConfirm qrcodegen is installed correctly:
pip3 show qrcodegen
Name: qrcodegen
Version: 1.8.0
Summary: High quality QR Code generator library for Python
Home-page: https://www.nayuki.io/page/qr-code-generator-library
Author: Project Nayuki
Author-email: me@nayuki.io
License: MIT License
Location: /usr/local/lib/python3.10/site-packages
Requires:
Required-by:
Install OpenSCAD
Install OpenSCAD from:
https://openscad.org/downloads.html
Follow installation instructions from site, using either the package or brew to install.
Install PrusaSlicer
Install PrusaSlicer from:
https://www.prusa3d.com/page/prusaslicer_424/
Follow installation instructions from site to install.
Download Script
The workflow is available from this repo directory:
https://github.com/gordonturner/creative-development/tree/main/qr-code-website
Either checkout the repo and use the /qr-code-website directory, or download the following files:
qr-code-website.py
qr-code-website.scad
data.txt
Also, if downloading the individual files please create a directory called /output-stl.
Please note, although the name of the project ‘qr-code-website’ has website in the name, this can be used to encode any value.
Input File
The input file is a simple text file called data.txt and has one line, that is the url value to be encoded.
Create SVG File
The qr-code-website.py script uses the qrcodegen library to encode the url in the data.txt file into a QR code and exports it as an svg.
The script is based on the example code from the QR Code generator (qrcodegen) project:
https://github.com/nayuki/QR-Code-generator/tree/master/python
There are other libraries / tools that will generate QR code svg files. However, OpenSCAD seems picky about what it will work with and had issues processing some svg files (especially the more ‘creative’ looking QR codes). The qrcodegen library is quite strict in what it generates and OpenSCAD works well with the output.
Run the qr-code-website.py script:
./qr-code-website.py -i "data.txt" -o qr-code-website-output.svgConfirm that a new files called qr-code-website-output.svg has been created. Open the svg and scan it with your phone and it should open the url from the data.txt file.
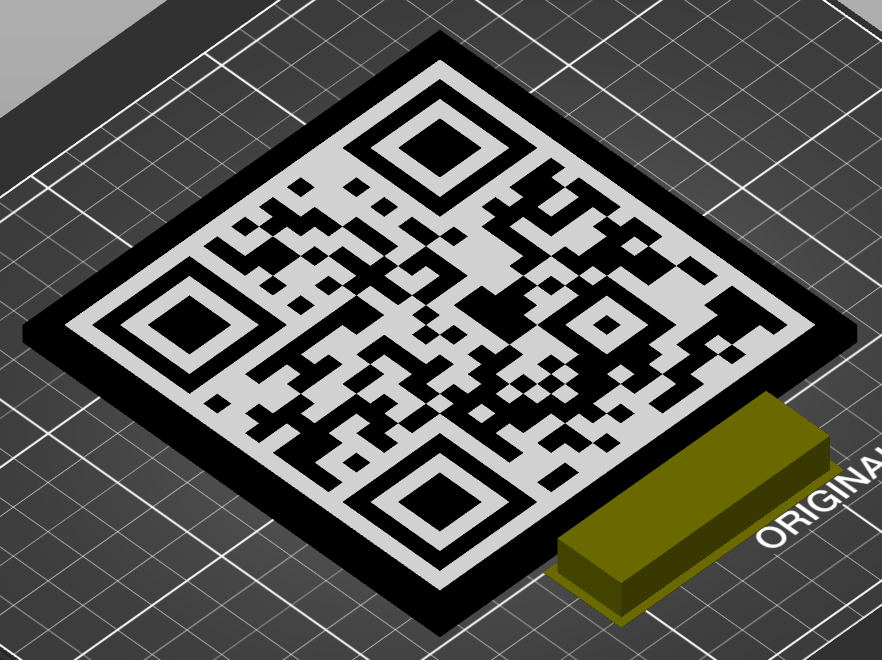
Create STL Files
The stl files are created using the qr-code-website.scad from the svg file.
The scad file assumes some dimensions to create a base and boarder around the QR code. Then the svg file is extruded to create the positive and negative (black and white) elements.
Confirm the path OpenSCAD application is correct, update if necessary.
To create the stl files, run the following commands:
/Applications/OpenSCAD.app/Contents/MacOS/OpenSCAD \
-Dmode=1 \
-o ./output-stl/qr-code-website-border-black.stl \
qr-code-website.scad

/Applications/OpenSCAD.app/Contents/MacOS/OpenSCAD \
-Dmode=2 \
-o ./output-stl/qr-code-website-base-black.stl \
qr-code-website.scad

/Applications/OpenSCAD.app/Contents/MacOS/OpenSCAD \
-Dmode=3 \
-o ./output-stl/qr-code-website-qr_code-black.stl \
qr-code-website.scad

/Applications/OpenSCAD.app/Contents/MacOS/OpenSCAD \
-Dmode=4 \
-o ./output-stl/qr-code-website-qr_code_negative-white.stl \
qr-code-website.scad
The four different modes will generate 4 different types of stl files (base, boarder, code and code negative). The stl files have in their name the appropriate colour to print (white, black).
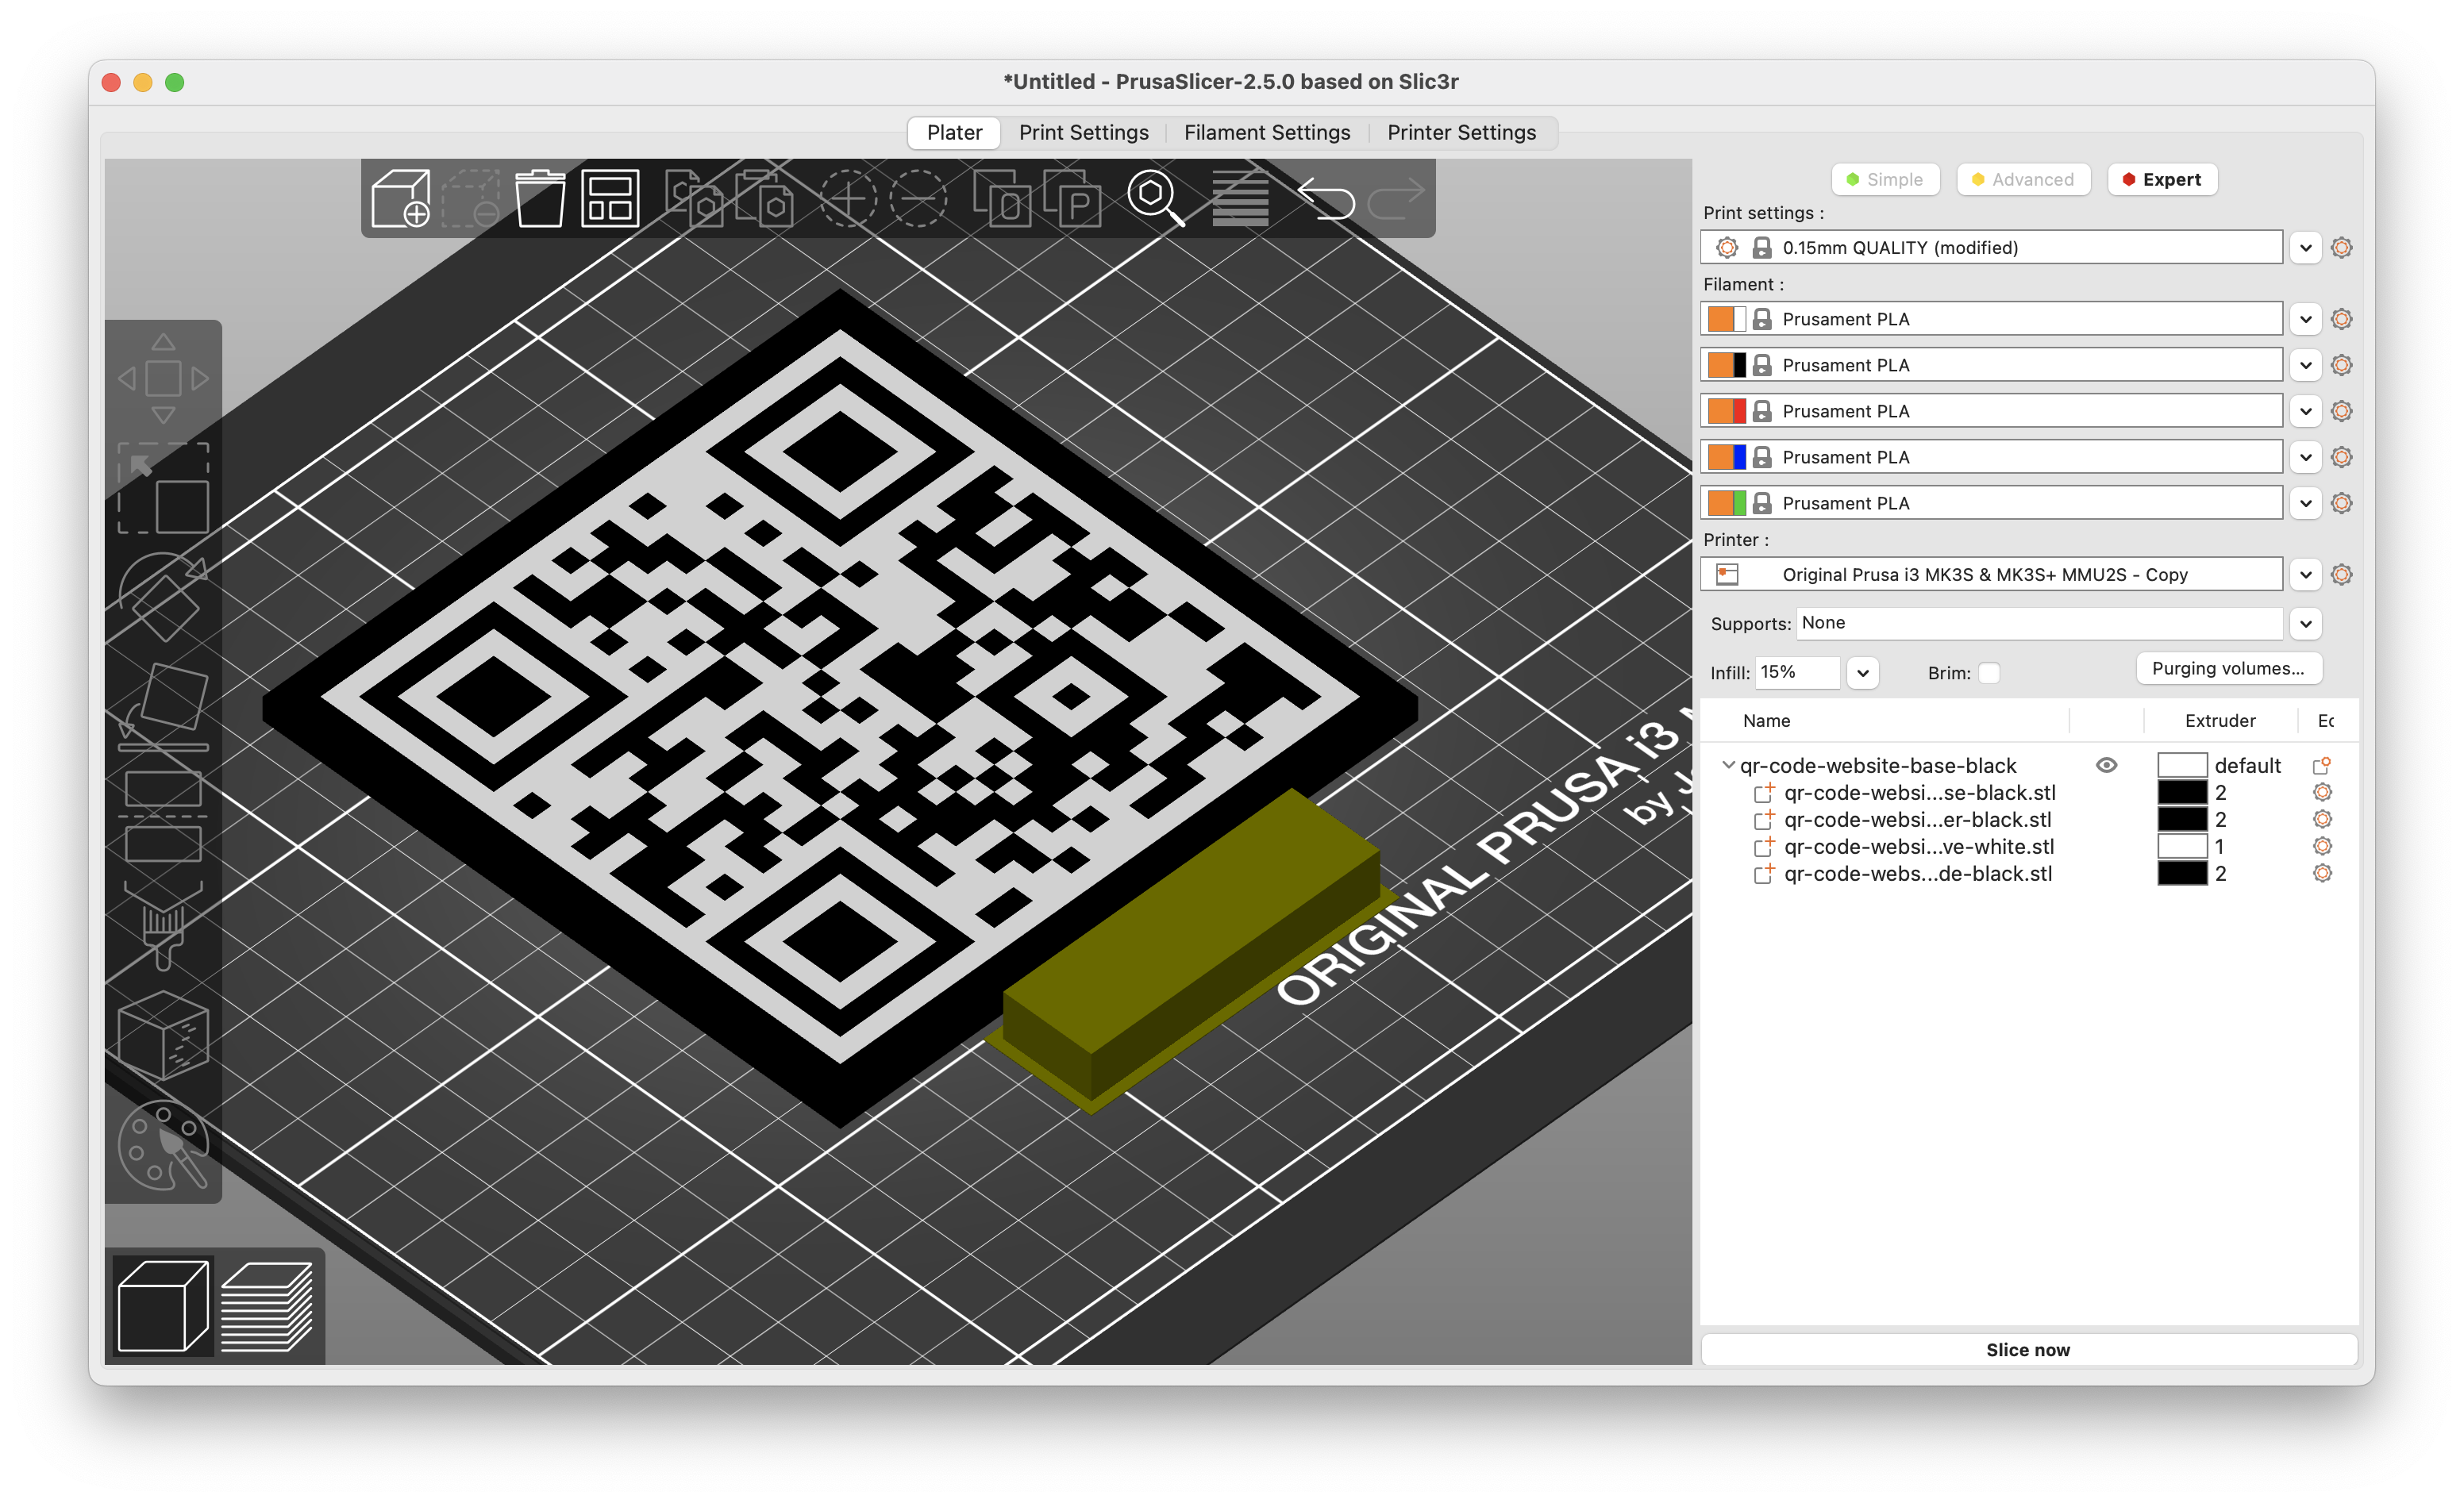
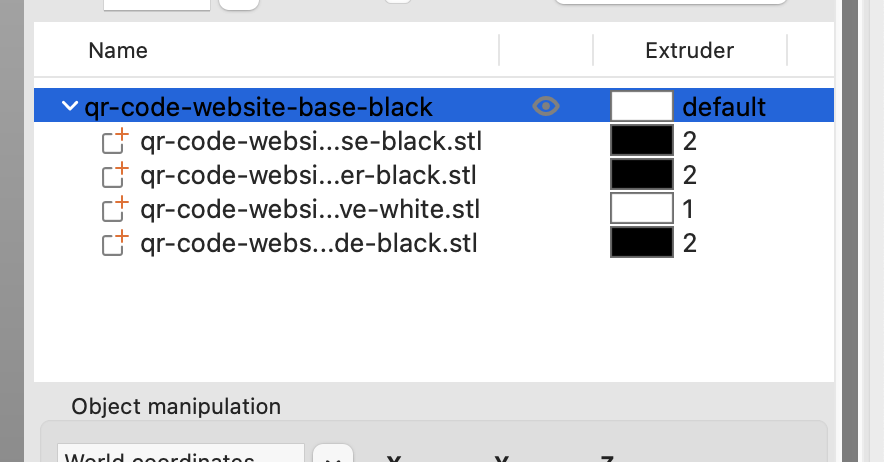
Slicing Files
Launch PrusaSlicer and drag all 4 stl files in at once into the application.
When the ‘Multi-part object detected’ prompt appears, click Yes to import a single object having multiple parts.

Using the object navigator on the right, set the individual parts to either black or white, refer to the stl object name to help with the filament colour selection.
Next, click on the Slice now button, then return to the 3D Editor View and click on the Arrange button.
Doing the slice step will reduce the size of the wipe tower to just 2 colours. Navigating back and clicking on Arrange will move the smaller wipe tower out of the way of the model to print.
Print it! The 100 x 100 mm should take about 8 hours at 15% infill with default PrusaSlicer settings.
Conclusion
There might be other ways to optimize the QR code to improve print time. Also, if you don’t have a multi material printer, you might consider printing a white base, switch to black filament and only printing the black code stl.
OpenSCAD visually is a bit basic, but the scripting functionality and the community / support behind it make it a very interesting tool to work with to create stl files in a parametric way. It is worth investing some time to learn it in addition to the more commercial offerings like Fusion 360.